

INVIROX GPS Wireless Dog Fence
Safety Instructions
Please read this manual carefully before use!

Product Introduction
1. The center point and the safe radius distance are set through GPS satellite positioning, your pet can move freely within the set safe range.

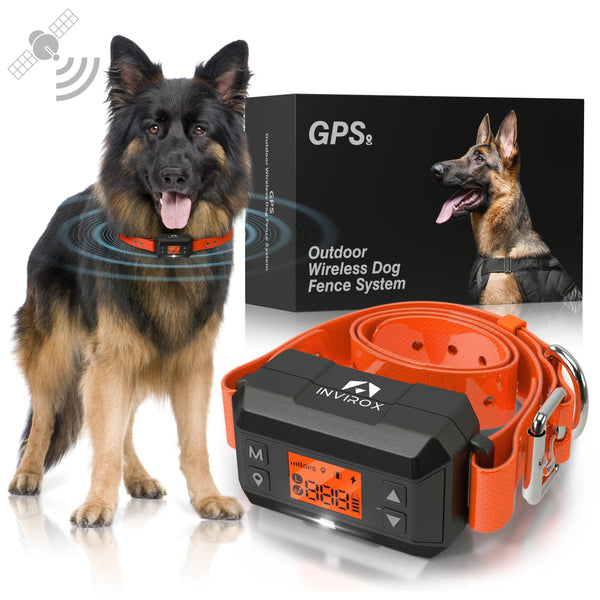
What You Get

Description of Buttons


GPS Collar Charging
Please fully charge the product before use!
Contact the magnetic charging cable port with the charging port, and the product can be charged once they are adsorbed to each other.

Installation

Function Introduction


- If you are unsure of the exact radius, you can measure it using the collar. After successfully setting the center point, simply walk to the desired boundary position. The collar will display on the screen the distance in yards from the established center point to your current location.


In automatic mode, the device will emit a warning tone when it exceeds the set radius for the first time. If the device continues to move outside the safety area or exceeds the radius for the second time, the collar will switch to level 2 activating sound, vibration, and static stimulation. To test the shock function on levels 2-6, please attach the test tool to the contact points of the device. When the static stimulation function is triggered, the test light will turn on.
① When your pet goes beyond the set safe radius distance range, the product will be triggered to work and give the first warning cycle consisting of 6 levels of tone, vibration, and static stimulation. After the 6th level, the first cycle ends, and the product enters the protection mode for 1 minute emitting sound only.
② After the end of the protection mode, if your pet has not returned to the safe area, the product will give the second cycle consisting of 6 levels of tone, vibration, and static stimulation. After the end of the 6th level of second cycle, the tone warning will continue until the battery runs out or your pet returns to the safety area.
Note:
The product will stop the correction anytime when your pet returns to the safe distance range.
Wearing Methods and Precautions
- Prolonged or tight collar wearing may cause skin irritation to your dog, which must be avoided.
- Please make sure not to let your dog wear the collar for more than 12 hours a day.
- Try to readjust the collar position on the pet's neck every 1 to 2 hours.
- Regularly check the collar's tightness to prevent excessive pressure.
- Do not attach a leash to this collar, as it may cause excessive pressure on the device.
- Clean your pet's neck area and the receiver's contact area with a damp cloth every week.
- Check the contact area daily for signs of rash or pain.
- Stop using the collar and seek medical attention immediately if you notice a rash or pain in your dog. If the condition persists for more than 48 hours, stop using the collar.
How to Assemble the Collar Strap
Reference Sizes of Different Dogs
TRAINING GUIDE
Proper training for your pet is critical for successful using the F810 Plus Outdoor Wireless Electric Fence, please read this section carefully.
Please remember that the INVIROX GPS Wireless Electronic Fence can not be an instant solid barrier, and we recommend at least 14 days of training. You can adjust our recommended training days according to your pet's learning style and learning ability.
PRECAUTIONS:
1. If your pet shows signs of tension or stress, please slow down the training schedule and adjust the training days, or increase the time to play with your pet in the safe radius.
2. Common stress signals include:
①The ears will twist backwards
②The tail is tucked
③The center of gravity of the body is downwards
④The back hair is raised
⑤Nervous / frantic movement or stiffening of pet’s body
3. Your pet must be completely comfortable near the Boundary Flags at the end of every training session. Actively complete each training session. Have fun with your pet throughout the training process. Training should be fun, fair, firm and consistent.
4. The duration of each exercise is 10 to 15 minutes. Don't do it too fast. More frequent short training is better than less frequent long training.
5. Even you think your pet responds well to the training, please complete the whole training. Strengthening is very important!
6. Remove the Receiver Collar after each training session.
7. Be sure to contain your pet by another means during the training period.(Add a collar, leash, etc)
8. During training, if you need to take your pet out of the safe radius distance zone, please remove the collar and bring your pet with you, or leave it in the car out of the safe radius distance zone.
OPERATION STEPS
Step 1: Prepare the INVIROX GPS collar with a pair of long and short static probe posts.
If your pet is a short haired pet, please use a short static probe. For long haired or thick haired pets, please use a long static probe (the hair at the static contact point can also be properly trimmed). Please tighten the static probe according to the installation method in this manual.

Step 2: Set the positioning center point and set the safe radius range

 It is necessary to use INVIROX GPS Collar to locate the center point for the first time. Please press and hold the positioning function button when the screen is lit. The display screen displays the positioning icon and "000" to indicate that the positioning is successful. (Please ensure that the signal strength is greater than or equal to 3. If there is no positioning icon and "000", it means that positioning is fail.)
 Please click the positioning function button again after successful positioning. Press the up / down button to adjust to the required safe radius distance (33-999 yards) when the distance icon and the distance number are flashing on the screen . After 5 seconds of no operation, the distance will be automatically confirmed, or click the positioning function button to confirm manually.

After setting the center point and the maximum radius distance of 999 yards, please leave the center point and move to the border where you want to stop. At this time, the distance yards between the current position and the center point will be displayed on the screen, which is the most reasonable safety radius distance.
Step 3: Place Boundary Flags

START TRAINING
- Please set up a separate collar belt on your pet's neck, and tie a traction rope.
- The traction rope cannot be put on the INVIROX GPS Collar, so make sure that the collar will not be subjected to other external pressure.
- Bring tiny pieces of treats that your pet will find desirable available (dried meat, hot dogs, etc.)

Stage 1: Train the dog’s border awareness (Day 1-3)
The training days are three days in total, three times a day, each lasting 10-15 minutes. Training objective: Make your pet aware of the border signs of the collar and sound warnings to define a New pet safe activity area.

Setting: Set the INVIROX GPS Collar to vibrate automatically.

Training Steps:
1.Lead your pet to the safe radius area with a traction rope and talk to your pet to praise its behavior(A1)
2.Please fully control your pet with the traction rope and take it to the flag representing the distance between the safety radius and the border. When the pet leaves the safe radius area, the INVIROX GPS Collar starts sounding. Let your pet stay for 3 seconds, then take it back to the safe radius(A2). (when your pet returns to the safe radius, please praise him for his good work immediately.)
3. Repeat this process on the same boundary sign until your pet actively refuses to go outside the safe radius area.(Note: In automatic mode, the intensity of the trigger increases with the number of triggers. For example, the first round trigger is a level 1 warning, and the second round trigger is a level 2 warning)
4. Continue to repeat the training around 3 to 4 border flags and make the process fun! If your pet retreats quickly or refuses to enter the boundary area, offer praise and treats as a reward.

Stage 2: Train the dog’s border awareness(Day 4-6)

- Repeat steps 1-4 in Stage 1.
- Notice the pet's slight reactions at first, such as lifting its ears, turning its head, and looking at the ground.
- Stay on the same flag until your pet refuses to enter the boundary area.
Stage 3: Distraction stage (Day 7-9)
Create distractions to tempt your pet to enter the
Boundary Zone, such as:


Stage 4: Supervision and Inspection (Day 10-14)

Frequently Asked Questions


